The Syllabus Week Checklist: Everything to Do Before Week Two
Quick answer
During syllabus week, collect every syllabus, extract all assignment and exam dates into one calendar, note the grading breakdown and late policies for each course, and confirm your schedule before the add/drop deadline. Finishing this in week one means you never get surprised by a due date later.
Drop your syllabus here
Every assignment, exam, and reading on your calendar in about 30 seconds. Free, no account.
PDF, Word, or a photo of a paper one. No syllabus handy? See a sample
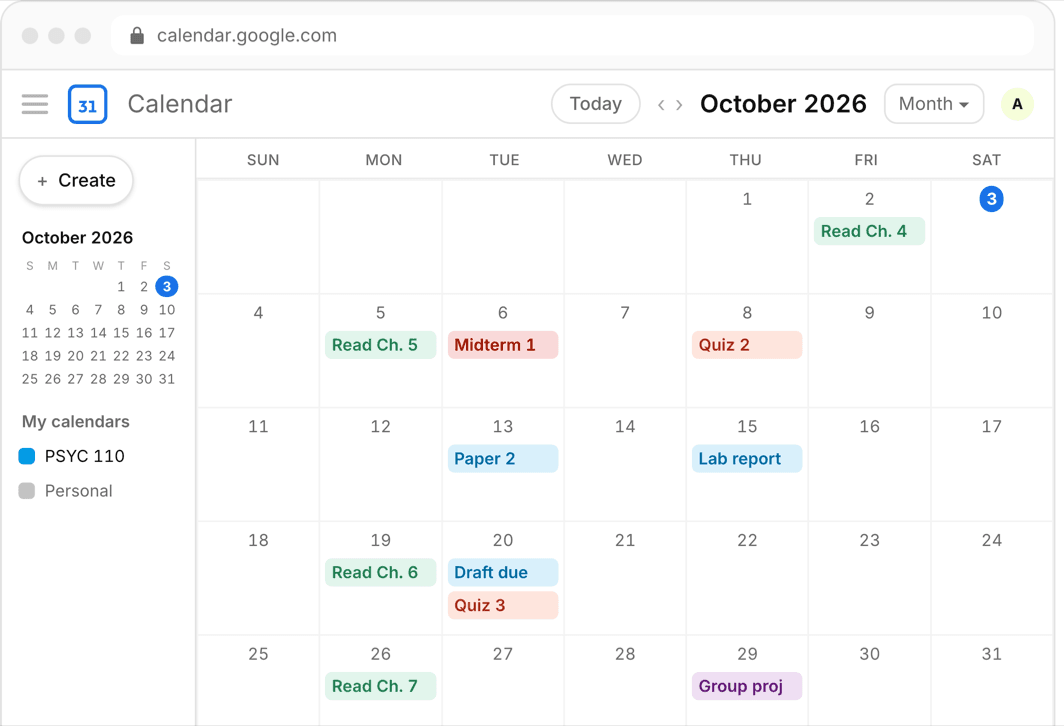
Syllabus week feels like a free week. It is actually the highest-leverage week of the semester: every professor hands you a document that lists exactly what will happen for the next fifteen weeks, and almost nobody reads it past the first page. The students who finish strong in December are usually the ones who did thirty minutes of setup per class in January or August.
This is the working checklist — not an explainer of what syllabus week is, but the specific things to do, in order, before week two starts. Work through it once per course and you are done.
Or skip all of it
Upload the syllabus. Get the calendar.
Every assignment and exam on Google, Apple, or Outlook in about 30 seconds. One syllabus free, no account, no card.
Step 1: Collect every syllabus in one place
Professors distribute syllabi inconsistently — some post a PDF to the LMS, some hand out paper, some bury it in a course website. Your first job is to get all of them into a single folder you control.
- Download the PDF from Canvas, Blackboard, or Brightspace for every course — do not rely on the LMS staying organized
- Photograph or scan any paper syllabus the same day you receive it
- Name files consistently: “BIO201-Fall-Syllabus.pdf”, not “document(3).pdf”
- If a professor says “the syllabus may change,” note the date of the version you have
- Check for separate lab or discussion-section syllabi — they often have their own deadlines
Step 2: Extract every date from every syllabus
This is the step most students skip and regret. Go through each syllabus line by line and pull out every assignment, quiz, exam, project milestone, and reading deadline. Put them all in one calendar — not five separate mental lists.
While you are in there, capture two more things: the grading breakdown (what percentage each category is worth) and the late policy. A 5%-of-grade discussion post and a 30%-of-grade midterm should not get equal space in your head.
- Every exam date and time, including the final exam slot if listed
- Every paper, project, and problem set due date
- Recurring items: weekly quizzes, lab reports, discussion posts
- The grading breakdown for each course, written next to the course name
- Late policies, drop-lowest-grade rules, and attendance policies
Step 3: Pressure-test your schedule before add/drop closes
Once all your dates are in one view, look for collisions. Three midterms in the same week? Two 20-page papers due the same Friday? Week one is when you can still do something about it — after the add/drop deadline, you are committed.
- Scan for weeks where three or more major deadlines stack up
- Check the total workload honestly: a schedule that looks fine course-by-course can be brutal combined
- Attend every class at least once before deciding to keep it — the syllabus tone and the professor’s tone can differ
- Know your school’s exact add/drop deadline and the later withdrawal deadline (which usually shows a W on your transcript)
- If you are going to swap a course, do it now while seats are still moving
Step 4: Set up your systems while the workload is light
You will never have more free time than syllabus week. Use it to build the infrastructure you will lean on in week ten, when you have zero spare energy for setup.
- Log into every course LMS page and confirm you can see all materials
- Buy or rent textbooks — check whether the syllabus says which editions are actually required
- Set up a folder structure (physical or digital) per course
- Put office hours for each professor in your calendar as recurring optional blocks
- Get contact info for at least one classmate per course
- Block your recurring commitments — work shifts, practice, clubs — so you can see your real available study time
Step 5: Do the date-entry step in 30 seconds instead of 3 hours
The single most tedious item on this checklist is Step 2 — manually typing forty or fifty dates from five PDFs into a calendar. It is also the step that pays off most, which is exactly why it is worth automating.
Classmaite does this step for you: upload each syllabus (PDF, Word doc, or even a photo) and it extracts every assignment, exam, grading weight, and reading deadline in about 30 seconds. You review the list, fix anything the professor wrote ambiguously, then sync it straight to Google Calendar, Apple Calendar, or Outlook — with reminders weighted toward the assignments that are actually worth a big chunk of your grade. Your first syllabus is free at myclassmaite.com/try, no account needed, so you can knock out this whole checklist before week two.
Frequently asked questions
How long should the syllabus week checklist take per class?
Plan on 20–30 minutes per course if you do everything manually: reading the syllabus fully, extracting dates, and noting policies. With five courses that is about two hours total — the best two-hour investment of your semester.
What if a professor hasn’t posted the syllabus yet during week one?
Email them politely and check the LMS daily. In the meantime, do every other step for that course — LMS access, textbook check, classmate contact — so you only owe the date-extraction step when the syllabus lands.
Should I read the whole syllabus or just the schedule?
Read the whole thing once. The schedule matters most, but the grading breakdown, late policy, attendance rules, and exam-makeup policy are where students get burned. Those paragraphs decide what happens when something goes wrong in week nine.